Saving Flower Seeds
by Diane Linsley
When I told my daughter that I was writing an article on saving flower seeds, she replied, “Be sure to tell them they don’t have to save seeds from Chinese forget-me-not because they stick to your socks, and that's how they get spread around the garden....Oh, and remember to tell them that poppy and nigella seeds are fun to save because you can pretend the seed pods are salt and pepper shakers.”
These are some good tips. As she pointed out, you probably don't need to save seeds from self-sowing annuals, since they will reseed themselves. If you want to grow the flowers in a different spot in the garden next year, you can gather the seeds as soon as they are ripe, and scatter them in the new location. They will germinate the following spring.
Her second point is that seed saving is an adventure for the whole family, and children should be involved. What better way to insure the future of our plant heritage than to teach children how to save seeds?
Saving flower seeds is pretty easy, but here is some advice to get started. The basic steps for seed saving are harvesting, drying, cleaning and storing.
Harvesting Flower Seeds
If you observe your plants closely throughout the growing season, you will know when the seeds are ready to harvest. Harvesting seeds at the right time greatly increases their viability.
Seeds are produced in either seedheads or pods. You can tell when seed pods are ready to harvest because they turn dry and brittle - just before they split open and spill their contents.
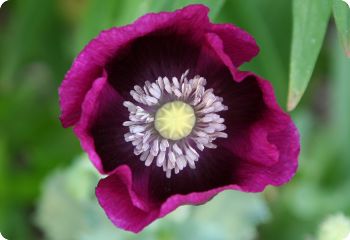
A good example is sweet pea. If you pick the pods too early, the seeds will be green. But if you wait too long, the pods will pop open, scattering the seeds. Choose ripe pods by feel. They should start to split when you squeeze them. Poppy seeds are produced in pods that resemble salt shakers. They are ready to harvest when the pod snaps off the stem. If it bends, give it more time.
Flowers like zinnia and cosmos produce seedheads. When the seeds are ripe, the seedhead shatters. It's time to harvest them when the seedhead falls apart in your hand when you rub it. Color is another clue. When calendula seeds ripen, they turn from green to brown.
When going out to harvest seeds, I stuff my pockets with snack-size ziploc bags, which are perfect for small amounts of seed. I use stainless-steel mixing bowls for larger quantities.
Drying Flower Seeds
Never harvest wet seeds. It’s better to wait for dry weather. Seeds should be dried in a well-ventilated room with a temperature between 70 and 95 degrees. Alternatively, you can dry seeds in a garage, out of direct sunlight.
It’s not always necessary to remove seeds from pods before drying, as long as they were not harvested wet. One exception is lavatera. I’ve had problems with lavatera seeds going moldy if they are not cleaned immediately.
When harvesting pods from plants like lupine, cover the mixing bowl with a piece of window screen, cheesecloth or other lightweight fabric that will allow air circulation while preventing the exploding pods from shooting the seeds out of the bowl. Or put them in a closed paper bag.
Small quantities of seed can be dried in plastic cups, on small plates, or in snack-size ziploc bags, propped open with toothpicks to provide air circulation. Shake down the seeds to a thin layer so they will dry evenly. Turn or stir them every few days. Most seeds require 2-6 weeks to dry completely. Drying time depends on the size of the seed and the temperature and humidity of the room.
Cleaning Flower Seeds
Seeds can be cleaned after drying for a few days. The chaff is easier to remove when it's dry, but the seeds will need further drying after they are cleaned. The following equipment is useful: different sizes of stainless-steel mixing bowls, a box fan, and a kitchen strainer with a metal screen. I use several different methods for cleaning seeds. Here are some examples:
Poppy: Place the pods in a gallon-size, plastic bag. Close the top, and shake vigorously until the seeds fall out of the pods. Dump the contents into a strainer held over a mixing bowl. Shake the strainer until all the seeds fall through, then throw away the empty pods. With the fan turned on low (outside the house), slowly pour the seeds back and forth between two mixing bowls to blow away the dust. Spread clean seeds on a plate or cookie sheet to finish drying.
Zinnia: After drying for a few days, loosen the seeds from the chaff by rubbing the seedheads vigorously between gloved hands. Use the mixing bowls and fan, as described above, to remove the chaff.
Campanula: These dust-like seeds cannot be cleaned with a fan. After putting them through a strainer to remove the largest pieces of chaff, blow on them with your breath while shaking the mixing bowl. It takes a while to get the hang of it, but soon you’ll be able to get the seeds perfectly clean. Wear goggles to protect your eyes from irritating dust. This is not a good activity for people with contact lenses, asthma or sinusitis.
By the time I’m finished cleaning the large amount of seed that I need for my business, I’m covered with dust and itching all over. Now it’s time for a shower and some Xlear nasal spray.
Storing Flower Seeds
Once the seeds are dry, they should be stored in a cool, dark, dry place. We have a cold storage room in our basement, but a refrigerator works, too. If you are only saving the seeds until the next planting season, you don't need to be as picky about the temperature – even a bedroom closet will work.
I don't think gardeners can really appreciate the life cycles of plants until they have tried saving seeds. I used to deadheaded my plants to prolong the bloom season. But now I appreciate plants in all their stages of life. To me, the seed pods and seedheads are just as beautiful as the flowers. You know the saying: “All the flowers of all the tomorrows are in the seeds of today.”
Related Articles
Saving Tomato Seeds - Fermenting and cleaning tomato seeds.
Self-Sowing Annuals - Flowers that reseed and come back every year.
Starting Seeds Indoors - Starting annual and perennial seeds indoors.
Recommended Books
The Complete Guide to Saving Seeds by Robert E. Gough
Seeds

